Rawdoors.com project by Steve Lowe.
Why did you decide to reface / remodel your kitchen?
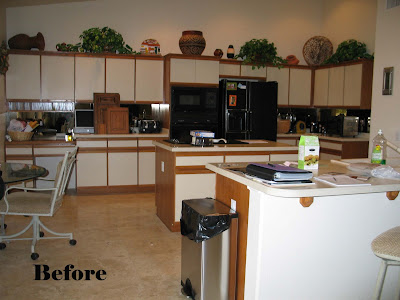
Our house is a little over 40 years old. I had refaced the original 1968 Olive green cabinets several years using a white wood grained Formica. It was a vast improvement and the white was still in style. But it wasn't the luxurious look we really wanted especially after visiting some friends in our old hometown for out 50th high school reunion. We wanted that classy $25,000 rich Cherry look, but at a fraction of the cost.
Why did you choose to use rawdoors.com to purchase your materials from?
Once we decided we wanted to do it, I started scouring the internet for door manufacturers. I found a bunch of them. We chose rawdoors.com for several reasons. Various styles, various woods, good order turn-around, good references, the company appeared quite stable, and your prices were quite competitive, especially with the incentive sale you had going on.
--We are a family owned business with nearly 40 years experience. - BC
Please describe your skill level going into the project:
My hobbies have been antiques and woodworking for about 40 plus years so to some I would probably be considered an expert.I don't consider myself one, but I do have a lot of experience. For example, I still brush on the finishes. An expert would put the doors in his paint both and spray them.
Describe the remodeling process or a project overview. Please let us know if you built or installed new or additional cabinets, veneered existing cabinets, attached new end panels, stained or painted the doors / face frames /moldings, installed molding, installed new drawer boxes and glides or just hung new doors.
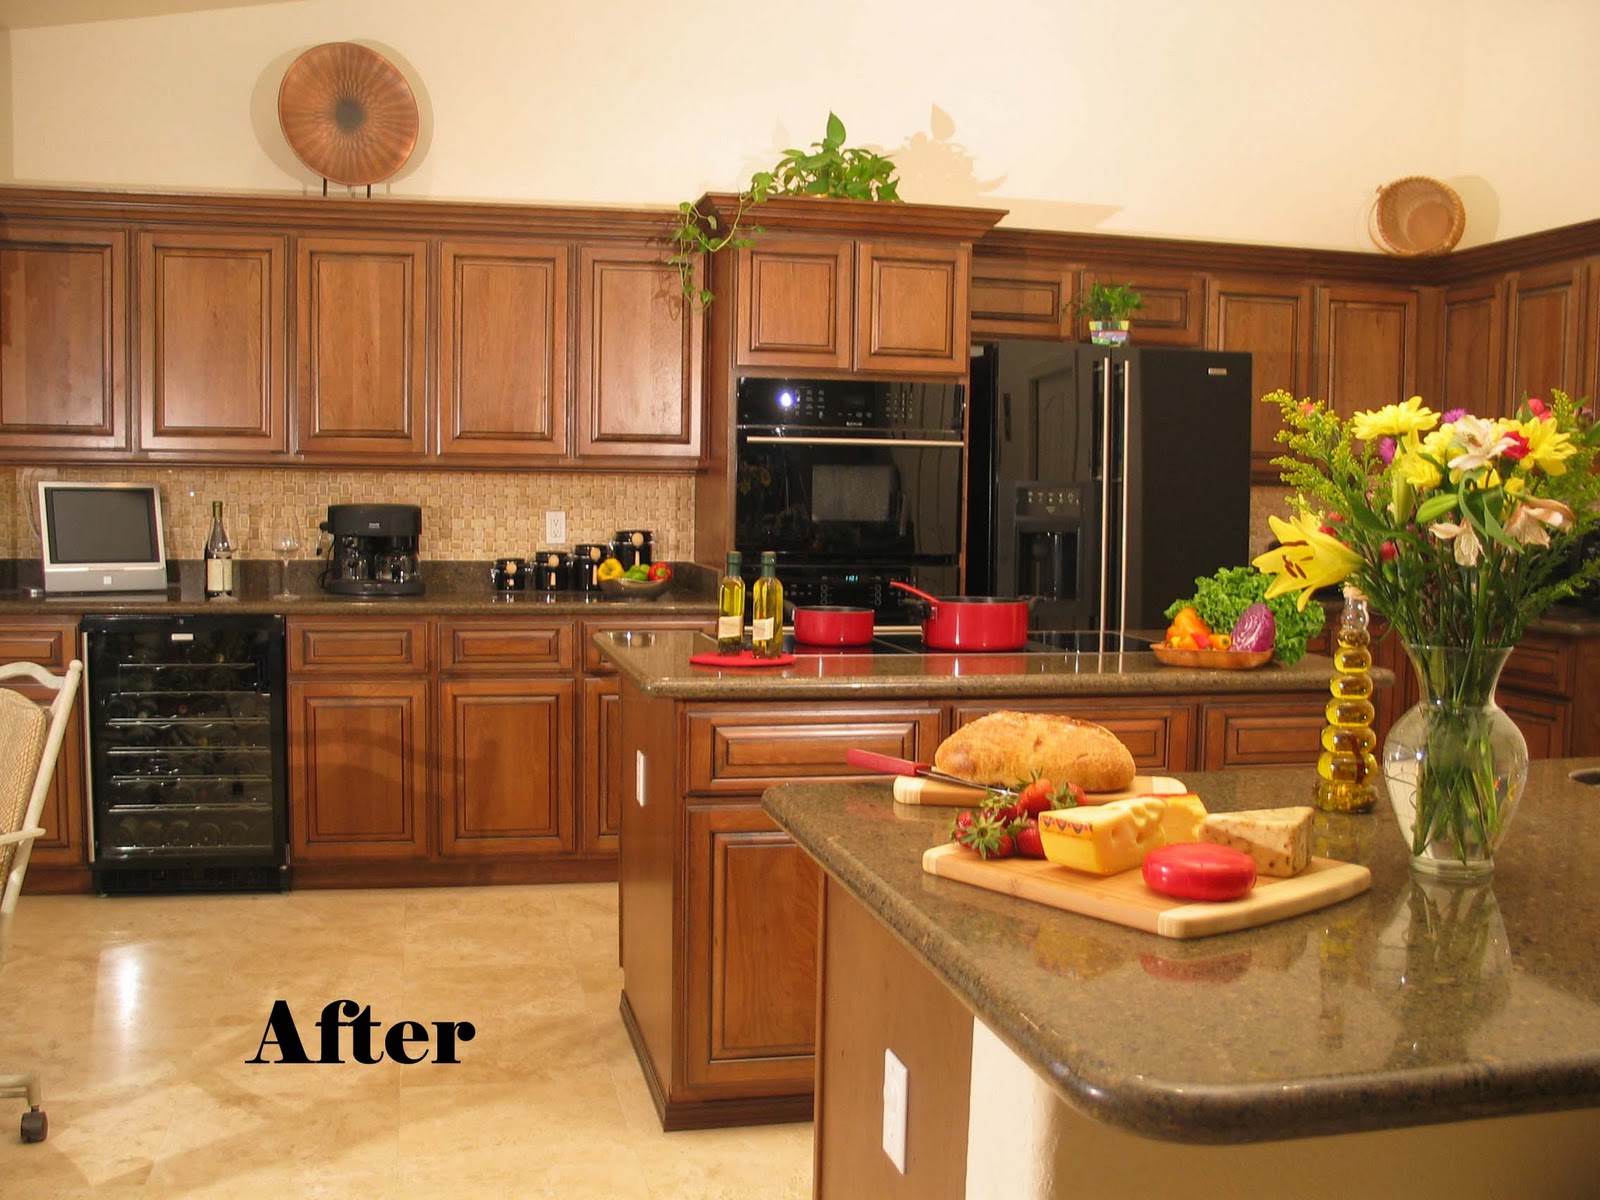
We have always liked our U shaped kitchen layout. We had previously tiled the floor and replace the electric surface burners with gas. We had also replaced the double ovens with a nice SS model. The cabinets were very solid and I had added a couple of extra drawers on the first go around. All we needed to do was add new doors, reface the frames, and add one end panel to the upper cabinets. I did build one cabinet that inserted into the wall above the double ovens. I also added some nice molding below the upper cabinets to set-off the back splash of tumbled travertine.
What was the most difficult part of the project?
The most difficult part of the project was leveling the old base cabinets for the new granite counter top. One end was over 5/8" lower than the other.
Were you able to achieve the results you desired?
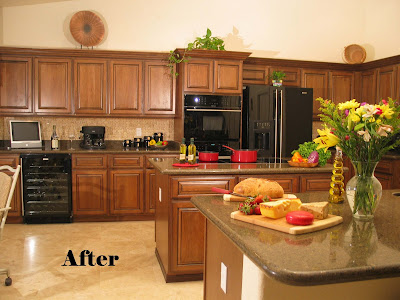
We are absolutely delighted with the finished results. Anyone that has seen it has been most complementary.
We got that expensive look at a fraction of the cost.
Please describe the finish process and stain, paint and / or clear coat materials used?
We used an oil based stain with 3 coats of polyurethane on top of that. We actually double stained the cherry doors (using 2 different stains) to get the exact color we wanted. Use the back of a panel door or drawer to do your color testing. Be sure & sand the backs, just as you did the fronts to get an accurate sampling. You should add the varnish to the sample back also as it will slightly change the appearance of the doors. It normally improves it by bringing out the highlights. If you are a novice or first timer, find a stain that you like with just one coat and it will save this extra step. There are enough color selections that you should be able to find one you really like. A high gloss coating will bring out the imperfections in your work. A satin finish is more forgiving.
How did you decide on the finish process you selected
Many years of refinishing have taught me that this produces excellent results. I like Minwax products. Their stains are uniform and their polyurethanes are considered fast dry. I actually used a mixture of clear semigloss and clear satin to get the sheen we wanted. Just bought a quart of each and mixed them together. I'll talk a little about the actual finishing here. The doors & drawers as they come from the factory appear to have been drum sanded with 220 and are extremely nice. The edges of the door frames and any recessed contours of the panels should be hand sanded with 220 to bring them up to this same smoothness. I probably spent 30 minutes on each door. I didn't use any fillers. Any imperfections in the wood were very small and just added a little more character to the doors. Use a good grade of sandpaper. I like Norton or 3 M using the 3X type or open cut type that cuts faster & lasts a lot longer. Always sand with the grain when possible. Vacuum all doors before staining. I did not use a sanding sealer on these doors. I like the graining to show the wood variations and a sanding sealer loses some of that contrast. Any wood stain is meant to be applied, let sit, and wiped off. I've seen too many home remodel shows where they will just soak a surface with stain and let it all soak in. This can produce a very splotchy unattractive appearance. I let the stain sit about 5 min. then wipe with an old tee shirt to get a pleasing uniformity. If you find it's a little too light, re-wipe with a wet stain cloth and then let the stain sit on the next doors a little longer. If it's too dark, wipe with a clean cloth soaked & squeezed with paint thinner. It will draw out some of the stain, then don't let the stain sit so long on the following doors. Once the doors are stained both sides, you are ready to start your clear coat. Stir your varnish, don't shake it. I did all the doors in the flat, one side at a time. Again, vacuum before coating. Then use a tac rag to pick up any other dust particles. Brush with the grain. Have a good light source positioned where you can see whats been coated & what hasn't. Try to keep a wet edge. By that, I mean don't work back into an area that has already started to dry. The brush strokes won't smooth out. I used a sponge brush and applied somewhat thicker to the flats than the edges and the contours. If you are too thick on the edges and contours, you will get runs. So keep it thin in these areas. Between coats, go up to a 400 sandpaper and lightly sand. A 220 used here will leave small ridges that will show up in the next coat. Too heavy a hand will sand through your stain, & you will have to add some stain just to that area to even it out. Between the second & third coats, you may just want to use a synthetic steel wool between coats instead of sandpaper. Vacuum & use the tac rag between all coats.
--Thanks for the detailed explanation. Your results look terrific! -BC
What advice would you give others when it comes to remodeling their kitchen?
It's going to take more time than you think. It will also cost you about 10 % more than you plan. But remember, every hour you work on it is an hour of pay in your pocket instead of in the contractors. Your kitchen down time is far less refacing than if you buy new cabinets. We only lost the kitchen use for two days and that was the leveling of the base cabinets for the granite counter top. The satisfaction of doing it yourself is most rewarding. I smile every time I walk through. If a 69 year old couple can do it, I'll bet you can too.
Total project cost:
We spent just over $5,400. And that included a $3,242 granite counter top, $275 Travertine back splash, new SS sink & faucet, The cabinet refacing & refinishing would probably be about $1,340. A real bargain!
Estimated project savings vs. alternatives if known:
I never priced new cabinets, so I don't have a direct comparison.
I do know we raised the value of our house by at least $20,000 & possibly as high as $25,000.
Anything else you would like to add?
I used a 20 mil cherry veneer (obtained from the internet) to reface the cabinet frames. Bought it with a 3M sticky back. So it was just a basic cut, peel, & stick. Much easier than the contact cement that I used on the Formica for the first kitchen redo several years ago. Of course, I had to stain & varnish it, but that went quickly.
- We now have 1/40" Pressure Sensitive Adhesive wood veneer for sale on our site - BC
--Great project and thanks again for sharing it with us. There's nothing like coming home to beautiful kitchen, especially when you know you did it yourself and greatly improved your home's value.


